End of September 2016:
It’s good to make plans. And I have plans both in the long run and for the season that will start soon.
Long Run – Layout
For the long run, plans for a larger layout are in progress. Jørnebanen is still the great inspiration. I haven’t got room for his new layout, jornebanen.dk. But the old kamstrupvej.dk might be pushed in. However, I would like a road to my Faller car, and my houses must be in a completely different style. And I wonder if I am able to divide the layout into for example four detachable parts, so I will be able to build details and make various repairs in smaller pieces?
Besides the inspiration from Jørnebanen, I also wonder if I have to let the layout consist of Aarhus H at the crossroads of the visible part of the track and let a reversal stretch over a shelf along the wall and around a corner and down under a desk and let the other end of the railway station disappear below to a shadow yard? A shadow yard is perhaps very good, but doesn’t it become a little tame with just a big railway station as the center piece?
Short Run – Layout
But a new layout will not be in the coming season. I’m not done making prototypes. However, it may be that I extend my prototype with an upper floor, and also do some prototyping regarding modularization. It’s something with 25 pole connectors, cutting rails and something that is accurate enough for the trains to cross the borderline between modules.
When building several floors, I have to figure out how much slope I dare to make on the rails. For example, if I will have a maximum of 2% slope and there must be a 10 cm level difference (trains and rails are about 6 cm, and there must also be room for little plywood and a servo or a wire that sticks beneath the upper floors) 10 cm * 100/2 = 5 meter rail.
A half circle with R1 curved rails is only pi times 360 mm or approx. 1.13 meters. In reality, slopes above 1.8% are only for mountain railroads. But model trains has so far I can read no problems with 2%. You can also go up higher – especially on a straight line, where you could go up to 5%.
New calculation: Let’s use 9 mm plywood and thereby get down to 8 cm level difference. At 3% there is a need for 2.7 meters. At 4% 2 meters. But it is still very much for a small layout. It takes a lot of trial and error and it certainly also requires that where two levels are to cross each other, one level must be “on the way down” and the other “on the way up”.
It is probably not entirely coincidental that kamstrupvej.dk operates with both basement, ground level and first floor. It’s actually half floors, that is, for example 4 or 5 cm level difference. And as far as I can see, he uses almost 3/4 circle to come up or down, i.e. about 1.6 meter rail. At 4 cm level difference, it gives 2.5%. At 5 cm it is just over 3%.
But now I am again thinking long run. I’d better stick to making a single stretch with adjustable slope – both a straight and an arc. Maybe just let a siding have the slope? It must be easily possible using Woodland Scenic stuff: http://lokdoc.dk/risers-420
Time and Place
I have determined that the time is 1987 +/- 5 years, though with a single steam-driven museum train.
The place is Denmark, however, with the visit of another museum item, my old American Santa Fe train.
And of course, there is also the Skive Vestsalling Railway, for which I have a tiny train (“rail bus”) and where I both intend to build Spøttrup castle and Spøttrup station. It was shut demolished in 1966, but has to be brought to life again on my layout.
Desirable Rolling Stock
As mentioned, my layout is Danish, anno approx. 1987. That is, I can use the following rolling stock:
- Green and/or red/black MH/MT for switching and freight trains.
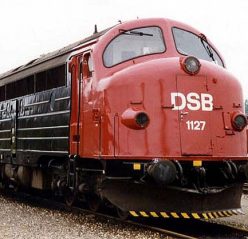
- Red/black ME/MY/MX/MZ for especially intercity trains, but they can also be used in other passenger trains as well as freight trains.
- Red MR/MRD. The MR train was not painted white until 1995 or later. And the blue/grey IC3 and MR tog was in the mid 0-es.
- Red MA (without wings on the front, but with white DSB logo – was painted silver in 1984. But he red one looks better)
- A and B wagons as well as a single Ag, which were in use in intercity trains way up into the 1990-ies
- The white IC3 train, which was delivered in 1989/1990
Freight trains is not my big thing. But I suppose I will need a freight train anno 1987 at some point in time.
And maybe some older wagons -preferably passenger wagons, so that my litra N steam locomotive can get something to haul. It was a freight locomotive while it was in use. But if there had been preserved one of them, it would probably be used for passenger trains as well.
Short Run – Software
In the short term, I will declare my Signal Controlled Warrants, which I implemented in JMRI in the 15/16 season, a success, and therefore not make more control software.
On the other hand, I need to do something about the locomotive sounds, which in a sense are also part of JMRI. In addition to writing some documentation for the file format with the sounds for virtual sound decoder, I’m going to add sounds for my MH locomotive and maybe also to the MR train. Santa Fe and BR216 can do with the existing JMRI sounds so far.
The problem is to obtain sounds without violating anyone’s rights. It has to be worked on. The sounds should consist of engine noise at different speeds and the transitions both during positive and negative acceleration. And in addition, for example screeching brakes, door noise, station messages, etc. Motor noise is the biggest problem. The other sounds are available online in editions that anyone can freely use.
Short Run – Model Building
And then there are my signals, where I’m not completely satisfied with the prototype I made in 15/16. I’m going to try again with a more realistic mast, thin copper wire down the mast and the ugly resistors away from the back of the signal head.
If I get my Faller car to run? Time will tell. It depends if I come so far that I get a road built.
First and foremost, the season is about model building. I want to build houses of paper. First, any of the houses that can be downloaded at http://www.solvangprivatbane.dk/ and then a house of my own design.
The procedure can be read on modelbane-piger.dk, from which I also bought a CD-ROM with a little more than that on their website. I need some materials:
– Cardboard / cardboard of 1.5 mm. Already purchased in Bog & Ide.
– Some glue to glue printed facades, etc. on the cardboard. First try done with a UHU Photo Stick (an acid-free adhesive stick) purchased from Bog & Ide.
– Plain white glue to glue the different parts of the house together. However, Witzel’s hobby suggests something different in their construction manuals.
– A scalpel and a cutting pad. The wife claims that we have that already. Modelbane-piger suggest a hobby knife.
– Steel ruler to guide the knofe while cutting.
– Corrugated cardboard with 2 mm waves. I will look at Panduro Hobby.
– Some watercolor paint (tempera blocks) to paint roof. The lady claims we have it. Otherwise, it will be Panduro.
– Matt spray lacquer to make printouts or watercolor paint more stable.
– Color samples on ordinary wall paint if something is to be totally smeared into paint.
– Clear plastic or PVC sheet 0.2 – 0.3 mm for window glass. It can be purchased at modelskibet.dk.
– Wood or plastic strips of 1 x 1 mm corresponding to 10 x 10 cm (exactly 8.7 cm) bars in real life. Maybe 1.5 x 1.5 mm, corresponding to 13 x 13 cm in fact. Modelskibet.dk is probably the best bid.
– Water sticks or straws (halved to become gutters). Otherwise, steel profiles can be purchased at modelskibet.dk.
– Pin copper wire (from wire) such as handrails, drain pipes, etc.
– Strange little things.
– Jørnebanen makes a nice sidewalk. For this purpose, plastic card and cobblestone are used, which may also be this one.
– Asphalt should be possible to make out of black sandpaper. But it will probably ruin the Faller cars. A smooth painted surface is probably more to “their liking”.
Perhaps my first self-designed house should be Borgen Trinbrædt. See http://evp.dk/index.php?page=svj—stationer
Next, I want to build the house I live in. And it must be including the garden, the driveway, the greenhouse, the furnishing inside the house, lights, etc. etc. The model train will not be able to drive, but there may nevertheless be one around the Christmas tree.
In addition to the houses, a number of different surfaces, such as pavement, gravel, road etc must be made.
And I want both rust and ballast on a small part of my rails. I bought a little bag of ballast, but I am still lacking paint. And I’ll probably also use a Roco track cleaning block http://lokdoc.dk/roco-185/roco-10915-p1675
In addition, there must be grass. I want to convert an electric flie swatter into a Grassmaster and “sow” some Noch grass.
I guess that is plenty of plans for a single season…………
And yet…..
Maybe I should start all over again. Why not make an almost-copy of kamstrupvej.dk. It can almost be in the same space as my prototype layout. It must be built on a frame, but with the top divided into modules like the city and / or the mountain on jornebanen.dk. Perhaps consideration should be given to having another basement level with a further reversal loop or the like. I must be able to reach all non-visible rails from below, so it must be considered very carefully.
I have found this recipe for the frame http://www.fjordens-naturskole.dk/naturskole/Modelbyg/Byg.htm, which I found as a link here: http://my1287.dk/index.php?option=com_content&view=article&id=191&Itemid=127
And I have been designing a bit in SCARM:
 If you “flip the drawing out” so it’s not on several floors, you can better see the principle. The orange is the mountain range, i.e. top floor. The white bottom is the “ground plane”, and then you move downwards through the top white and further down to the blue:
 Or in 3 dimensions:
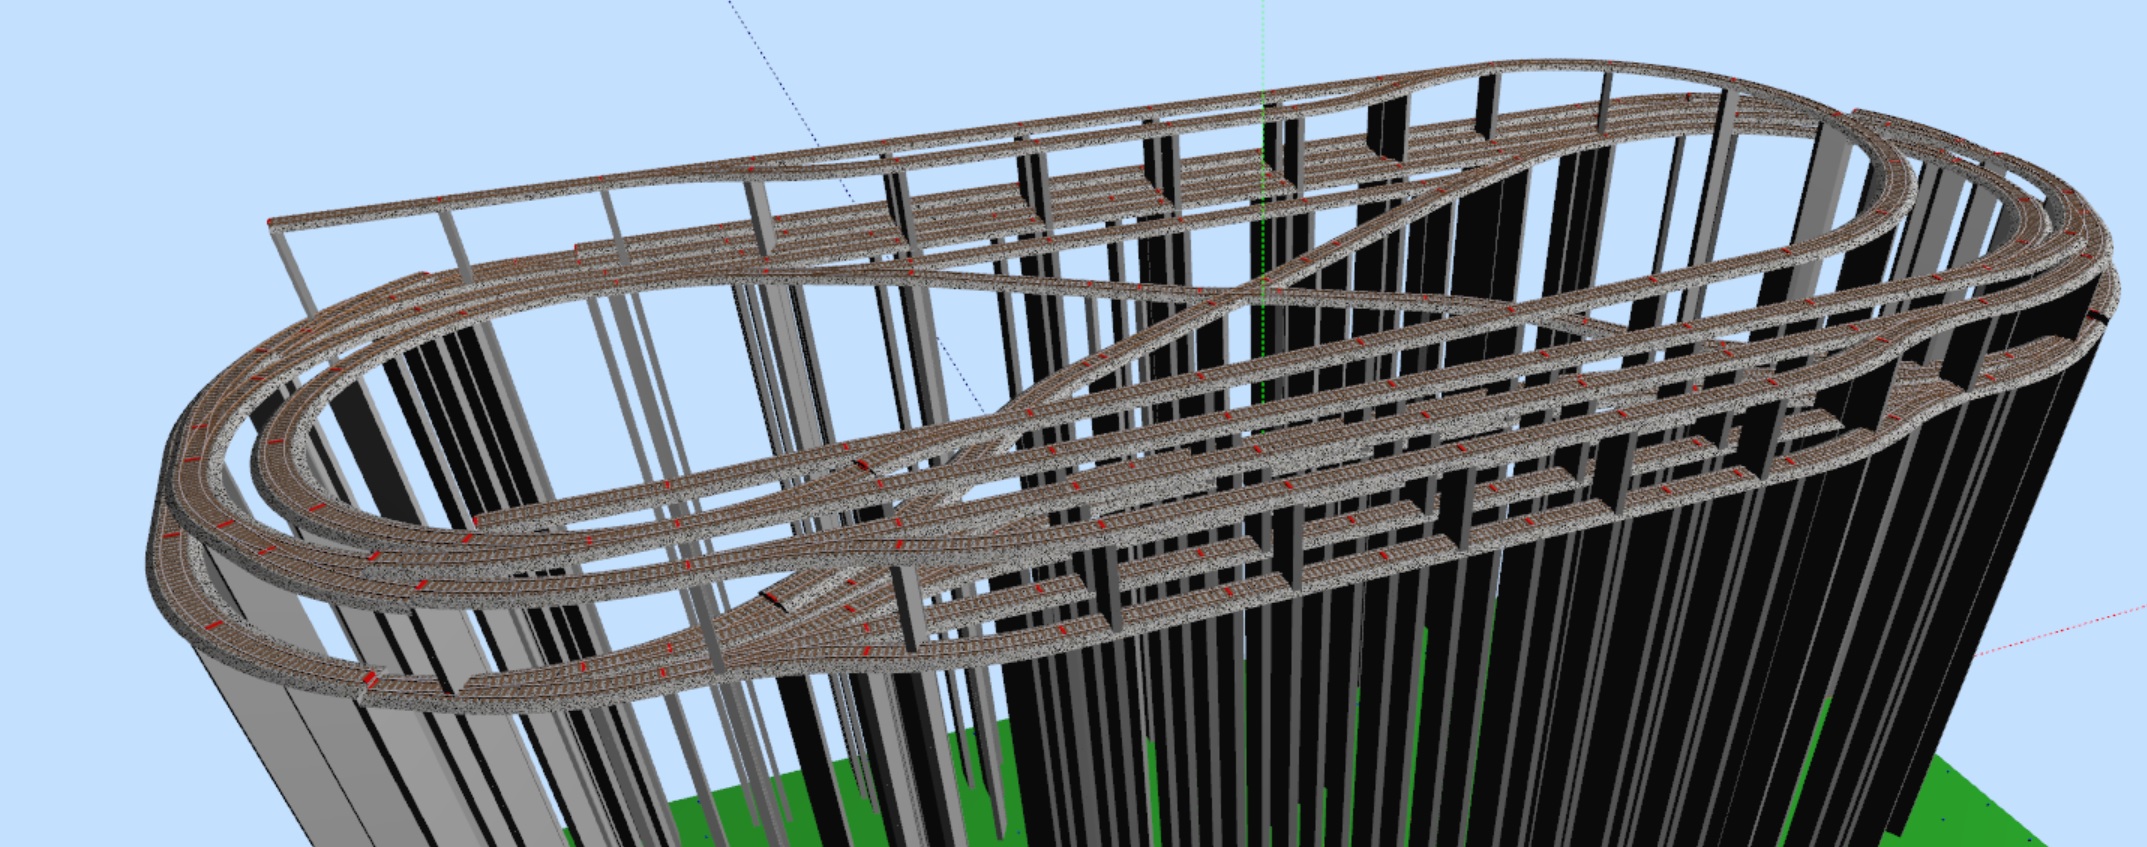 The visible part of the layout looks like this (though it may not be completely symmetrical – maybe the rails should disappear into a viaduct or the like on one side?):
 It should accommodate a couple of cities, a country road (to the Faller car) and some fields, lakes, a campground etc. But it is not yet designed.
October 2016:
October 6
I have begun building a house. That is, I have scaled up and printed a guardhouse from solvangprivatbane.dk and cut and glued the walls on the cardboard. And then my efforts are until further halted.
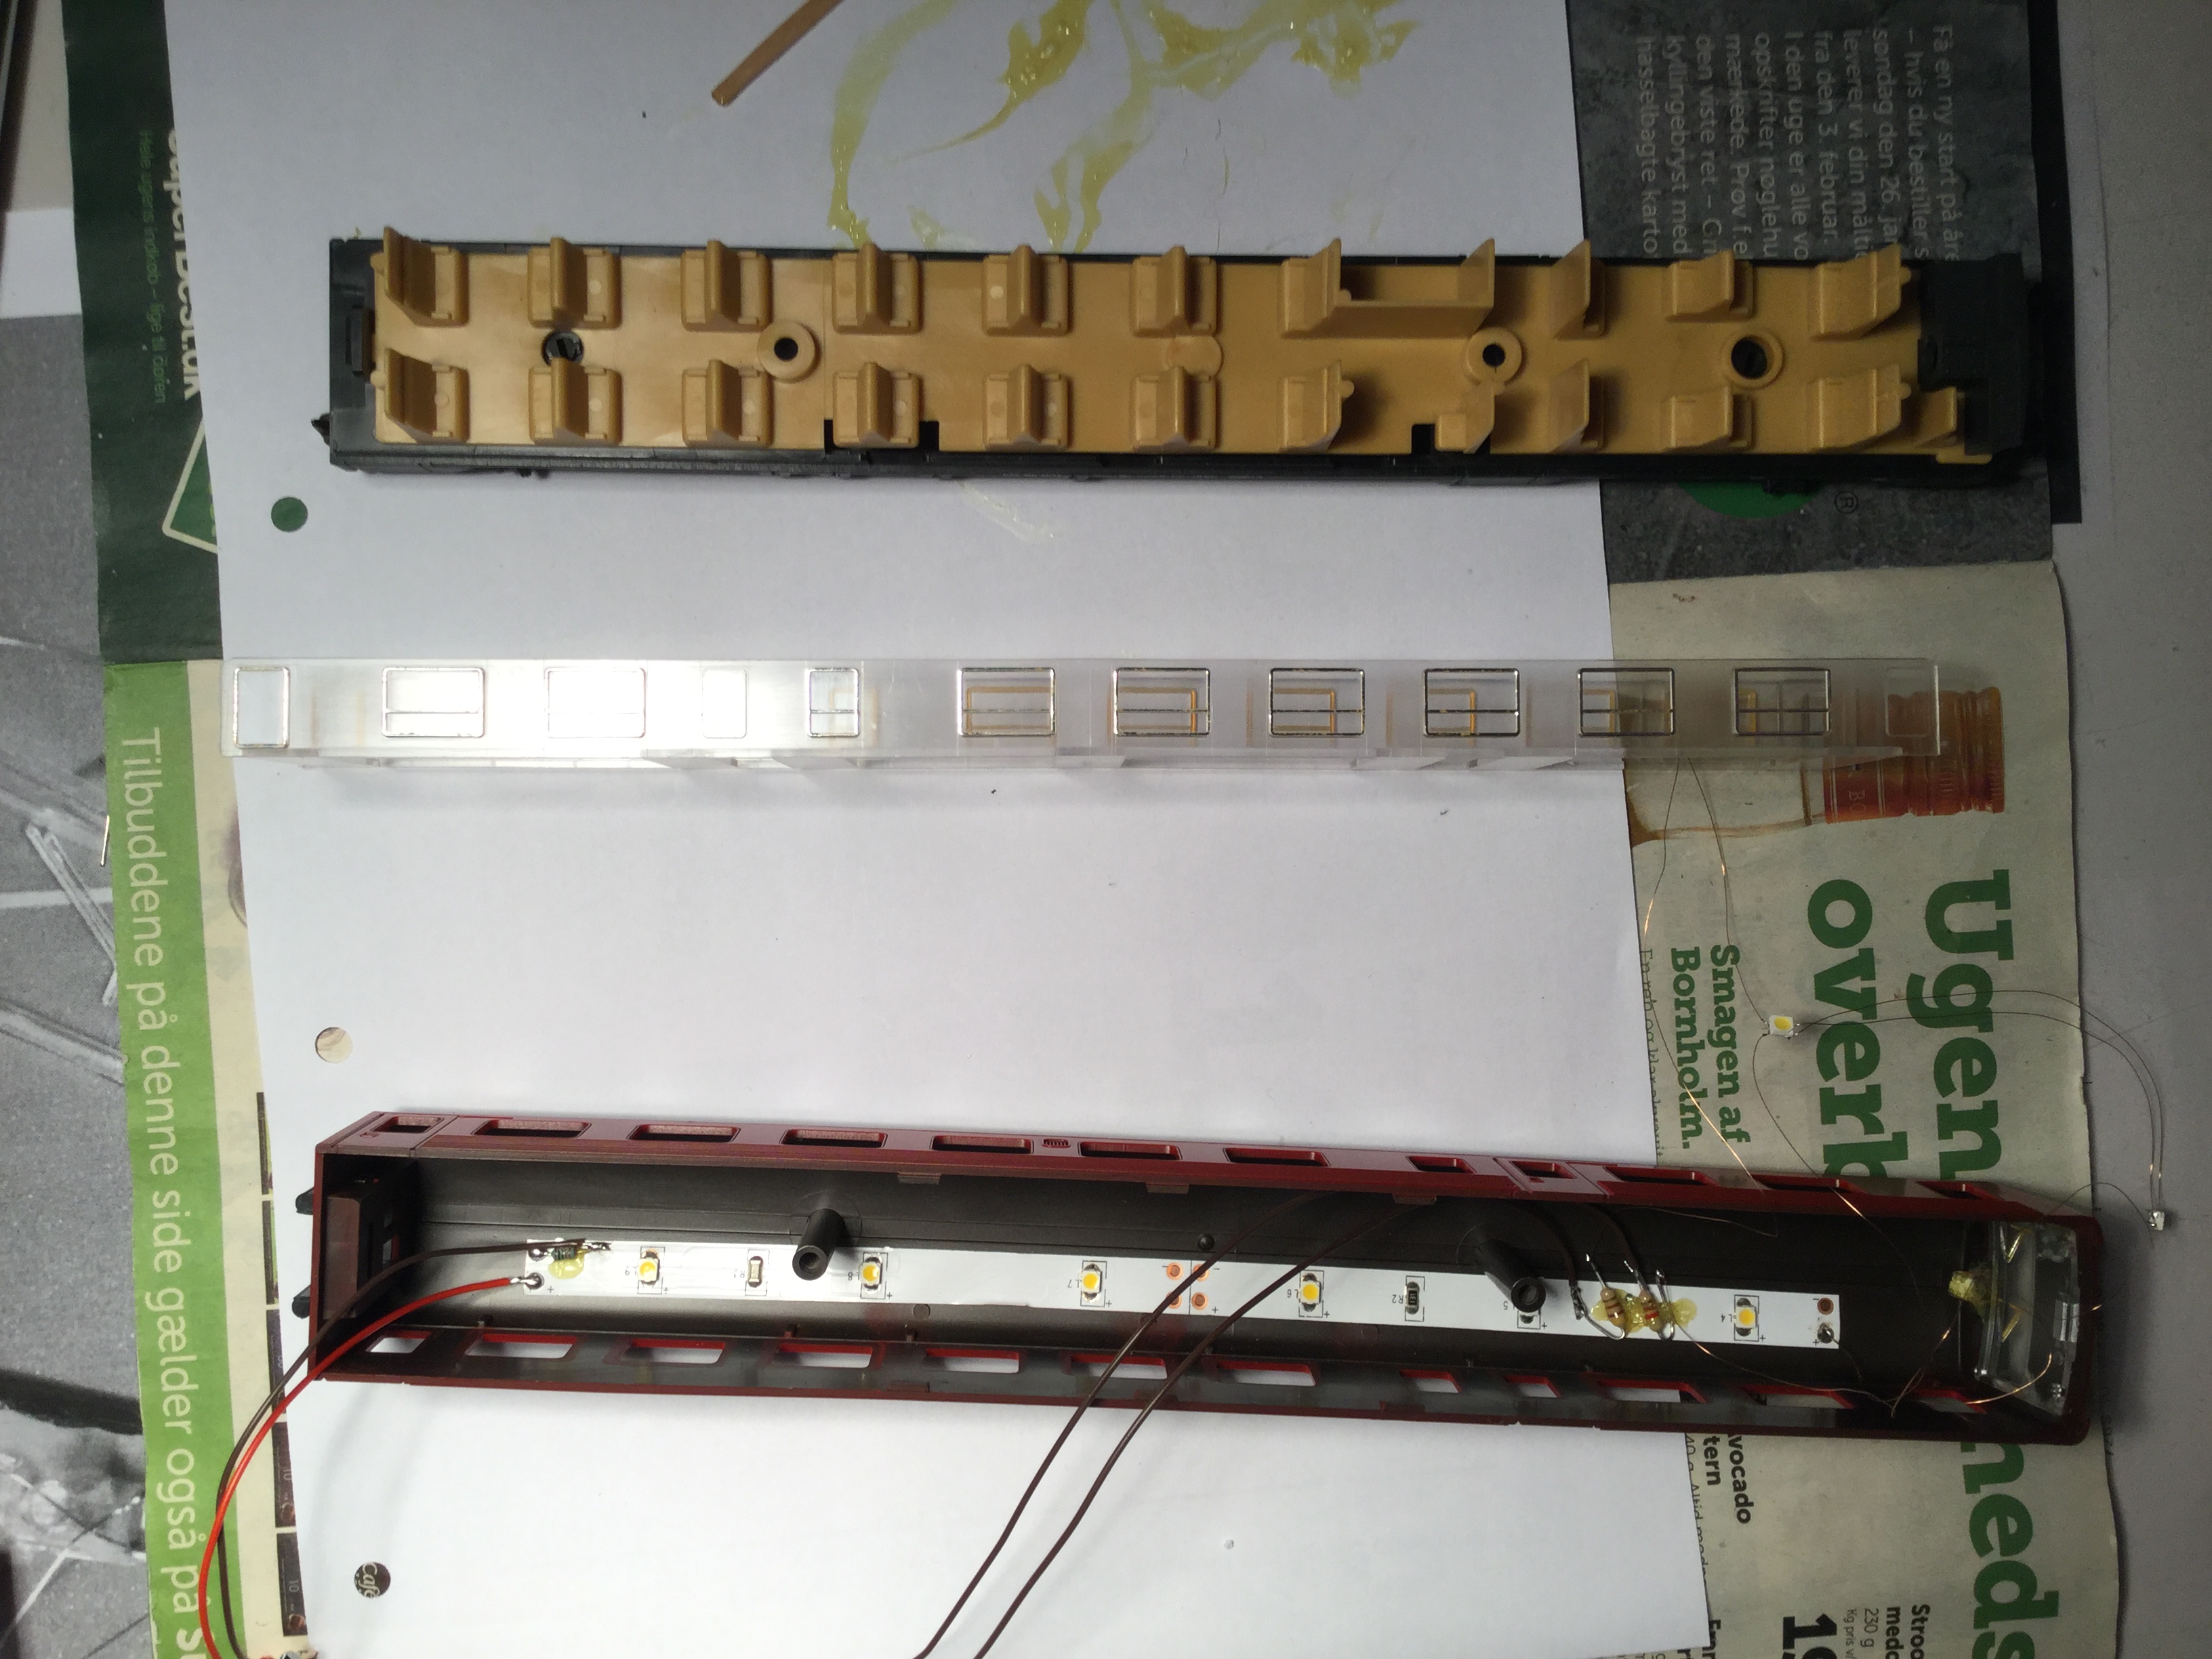
In addition, I have been shopping for the conversion of my Lima MR train: Last year I bought both an ESU LokPilot v.4, fine LEDs from NiceLED.dk (for front and rear lights), LED strips for ceiling lights in Jem & Fix etc.. I also have lacquered copper wire, relatively thin wire and more. And now I have also bought a NEM652 plug with a wire harnish, so everything should be ready. Hopefully there will be time in the coming weekend.

October 9
The Lima MR conversion is on it’s way:
 I need to get the glue dry in the locomotive so I can get it screwed together.
The other wagon is not yet disassembled. But the LEDs to go into the wagon are almost ready. Only a few wires need to be soldered. And then the diodes must be glued and the wagon will be reassembled.
October 11
MR (locomotive part) conversion done:

Now I only need to finish the light in MRD (the other part of the train).
October 14
The MRD is done except for the two lower LEDs, which are not yet glued. Tomorrow it is Saturday and the greenhouse must be emptied for tomato plants. So there will not be a lot of time for model trains. But I guess I might be able to do the last bits on the MRD Sunday.
 It’s not progressing very well, because I have to steal 1/2 hour here and there. There is much else to do with work, greenhouses, etc.
But now I’m building train rather than electronics. Soon it will be houses and countryside. It will be real model building.
I am also having the guard house. It smells even more of “real” model train.

October 16
The MR tain is done and another weekend has passed – mostly with greenhouse, cleaning etc.
In addition to the completion of MR, I have also been cutting the first outer wall for the guardhouse. I am in doubt as to whether the solvangprivatbane recipe is correct. I’m somewhat nervous that I end up with some very ugly corners. Modelbane-piger write that the brick paper must go a cardboards width beyond the cardboard so that it covers the corner of the house. It seems correct. But it’s not going to happen the way I’ve started now. However, it’s not too late to change the method, so I think I’m skipping the Modelbane-piger recipe and cutting out the paper pieces first, then lining with paper and then collecting.
October 17
And now back to wagons: I also have some B wagons from Lima that need some light. It is easy enough, according to digitaltog.dk. Or maybe it’s a little over-interpreted. Now I have ordered even thinner (0.04 mm2) wire, smaller plugs and a function decoder from niceled.dk. And in addition, I’ve previously bought a pair of (Märklin) collector shoes and (noname) powerups from lokdok.dk. Then we need to see how it works. If everything is well, the MR train will also get the thinner wires and smaller connectors.
Regarding the B wagons, it is my intent to equip one of them with collector shoe, tail light and interior light. The next wagon will only get the interior light, and I will use a thin wire and tiny connectors to get power from the first wagon to the next.
I use the Lima B wagons because they can be purchased in large amounts for small sums. Not because I will in the long run use them. In contrast to my MR train (which is good and nice, but of course used), my B wagons are better described as well used.
If I later make a similar conversion of wagons with NEM shafts, I would probably consider using power-carrying couplings rather than wires and connectors between the wagon. Eg. Viessmann 4-pole couplings. But I do not sacrifice money on equipping Lima cars with neither NEM shafts nor links.