September/october 2014:
I am starting over – this time using Märklin C track:
Why bother more with trying to make the M track turnouts work with servos?
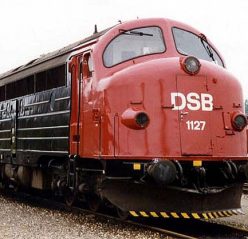
My layout shall not be built with M track anyway. So I have now bought the track from a new Märkling start set. There is just enough to my oval with a siding and another blind piece of track.
Controlling a Märklin C track turnout using a servo:
WIth the help of to tiny pieces of plexiglass, a piece of 1 mm (later substituted by 0,6 mm) piano wire (modelskibet.dk) and some double sided tape (the best from Tesa), it was surprisingly easy to make the servos drive the turnouts:

The piano wire is attached to the same small plastic rod that Märklins original clack-clach drive utilizes. Only the servo does it slowly, without much noise and a lot more like in the real world. And to a fraction of the cost.
The piano wire is bent so that it has a zig-zag form shape in the servo end and so that it forms a small circle in the other end. Make sure the circle shape is oriented correctly, so that it fits flat around the rod. And make sure that the circle is at the center of the piano wire. If the circle is to one side of the wire, it will not work. See here.
There are two pieces of plexiglass: One underneath the servo to give it a slight distance to the turnout, where the servo horn can move. The other piece has a slot grinded into it, so that it can sit above and guide the piano wire as well as keep the piano wire onto the rod of the turnout.
I am using 3 mm plexiglass. The two pieces are about 10 x 25 mm and 20 x 25 mm. The piano wire is in a hole on the servo horn about 7 or 8 mm from the servo center.
Before mounting the servo in the turnout, it has to be connected to the decoder, so that it can be centered. Or to make it easier, buy a servo tester (roughly a potentiometer and a 555 timer).
First center the servo, then mount the horn. Then turn the servo so that it corresponds to the position where the piano wire and the rod on the turnout are fully extracted / visible. Then mount the piano wire to the servo and then the servo + wire to the turnout (using double sided tape).
Using double sided tape and not super glue has many advantages: It is easy. It is clean. No toxic fumes. (Except for the de-greaser that you need to use to clean the surfaces with first).
But first and foremost: The whole thing can be taken apart again without any harm to any part. Do not use violence. Instead, twist or push a srewdriver into the tape and twist. Then just roll the rest of the tape away using your fingers. Never tear into the servo or the turnout.
Parquet underlay instead of cork:
With my new C track, I also want to try out an other thing: Noise damping.
I have bought some parquet underlay (the smallest possible package, i.e. 15 square meters). That should be enough for many years to come. But it may be useable to build a wall or a mounting or something. It is a lovely shapeable material.
This is my prototype ready for the track. Note the markings for holes for servos and wires:

Now, it is going to no trouble at all to get that bit og choo-choo train running. And now with remote controlled turnouts.
But ohh no: One of the servo decoders does not work. It seems to be the PIC that is defect. That can of course happen. And luckily I have a spare and a PIC programmer. So it did not take long to get it working.
Isolating the the center rail of Märklin C track:
Next problem: Well-functioning current sensors and feedback module is not enough. The new C track are much more difficult to work with considering isolating the center rail between two blocks than the old M track.
The old ones were easily isolated using just a tiny piece of paper. C track seems only to be possible to isolate using the small red plastic things available from Märklin.
They are ridicuosly pricy, difficult to mount and easy to destroy. Some of them cracked, so they do not isolate after all.
I will try to use tape or paper or something else. Or I might end up cutting the center rail on some of the track pieces.

Bullet-proof, free, easy: Just break and remove the contacts on one of the track pieces. Paper does not work. And neither does the red things from Märklin. Not 100% anyway.
